Guide to Installing Sims 4 Mods & CC

Installing mods and custom content, often called CC, in The Sims 4 is simple once you learn where the files go. This guide takes you through the process, including where to put files, how to enable mods in-game, and how to fix issues if something doesn’t show up.

What are Mods and Custom Content(CC) ?

Mods change or add gameplay features, such as new interactions, careers, traits, and systems.

Custom content usually adds items like hair, clothing, furniture, makeup, presets, and overlays. Both are installed the same way, by placing the files in your Mods folder.

Step 1: Find Your Mods Folder

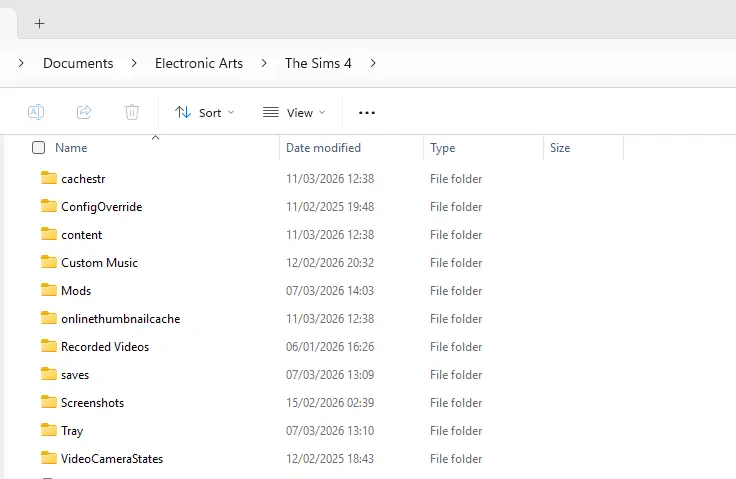
Your Mods folder is in your Sims 4 user documents, not in the game installation folder.

On Windows:
Documents > Electronic Arts > The Sims 4 > Mods

On Mac:
Documents > Electronic Arts > The Sims 4 > Mods

If you don’t see a Mods folder, launch the game once. The Sims 4 will create it automatically.

Step 2: Understand file types

Most mods and CC come in these file types.

Package files: end in .package
These include CC items and some mods. They go directly into your Mods folder or into subfolders inside it.

Script files: end in .ts4script
These are for gameplay mods. Script files can go in your Mods folder, but they should be only one folder deep. If you place them too deeply, they won’t work.

Zip, RAR, or 7z files: these are compressed folders
You need to extract them first using a tool like 7 Zip or WinRAR. Do not place zipped files directly into your Mods folder.

Step 3: Download and extract

When you download a mod, you will usually get a zip or RAR file.

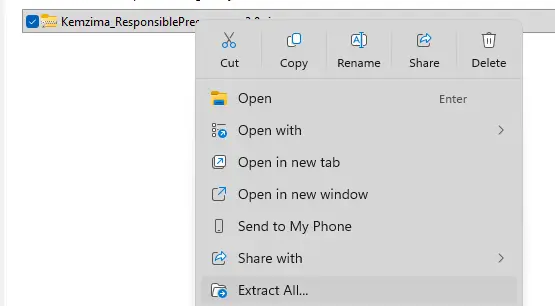
Right-click the file and choose Extract Here or Extract to Folder.
Inside, you should see .package files, and sometimes .ts4script files. You may also find a Read Me file. Always check it for requirements and compatibility notes.

Step 4: Move files into the Mods folder

Drag the .package and .ts4script files into your Mods folder.

Good structure examples:
Mods > CreatorName > ModName.package
Mods > CreatorName > ModName.ts4script

Avoid this for script mods:
Mods > CreatorName > ModName > Version1 > ModName.ts4script

That is too deep, and the game will ignore the script.

Step 5: Enable mods in game

The Sims 4 blocks mods by default. You have to turn them on before they’ll show up.

Open The Sims 4 and go to:

  • Options > Game Options > Other

Turn on:

  • Enable Custom Content and Mods
    Script Mods Allowed
  • Click Apply Changes and restart the game. Restarting is necessary for script mods.

When the game loads again, you may see a pop-up listing your installed mods. This is normal and confirms the game detects them.

Step 6: Check that everything works

Create or load a save.

For CC:
Open Create a Sim or Build Buy mode and check the filters for Custom Content.

For mods:
Look for new interactions, menus, or settings added by the mod. Many mods also include a settings menu on the computer, phone, mailbox, or a pie menu option on Sims.

Step 7: Troubleshooting if mods are not showing

If your mods or CC do not appear in the game, work through this quick checklist.

  • Make sure you extracted the files and did not install the zip.  
  • Confirm the files are in the correct Mods folder, not in the game install directory.  
  • Check that script mods are only one folder deep.  
  • Confirm mods are enabled in Options and you restarted the game.  
  • Delete localthumbcache.package in your Sims 4 folder, then relaunch.  
  • Remove outdated mods and test with just one mod installed to find conflicts.  
  • If you use multiple script-heavy mods, consider installing Better Exceptions by TwistedMexi to help identify broken files.

Step 8: How to uninstall a mod

To remove a mod or CC, delete its files from your Mods folder. Then delete localthumbcache.package again to clear cached data. If the mod added gameplay systems, read the creator’s uninstall notes first, as some mods require you to remove in-game objects or settings before deleting.

That’s it! Once your Mods folder is set up properly, installing new mods and CC is as simple as extracting, dragging, and restarting.

Leave a Reply

Scroll to Top

Discover more from Kemzima

Subscribe now to keep reading and get access to the full archive.

Continue reading